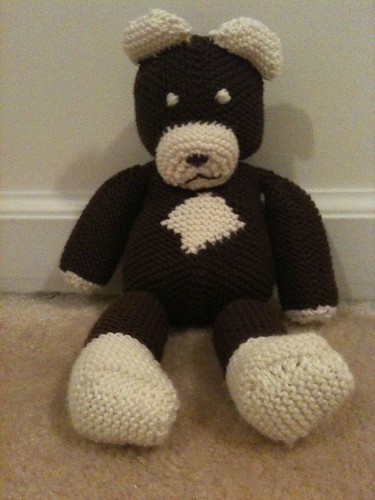
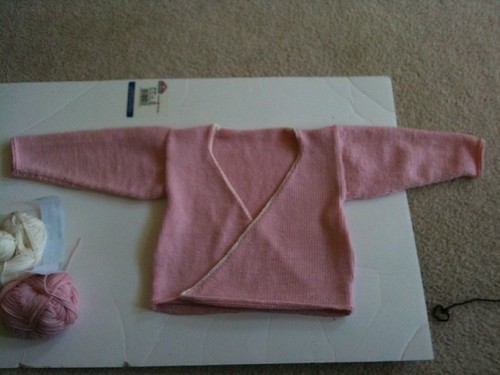
After completing the
ballerina wrap it was time for a fun and simple project. There is a pattern in
Simply Baby by Debbie Bliss that I have been wanting to try, however the pattern looked a bit intimidating. After reading it over two or three times, I decided it wasn't nearly as bad as I had thought (flash back to chemistry labs!) and with some modifications, the perfect project. After my less than satisfactory experience with the Debbie Bliss Baby Cashmerino yarn, I decided to head to my favorite local store
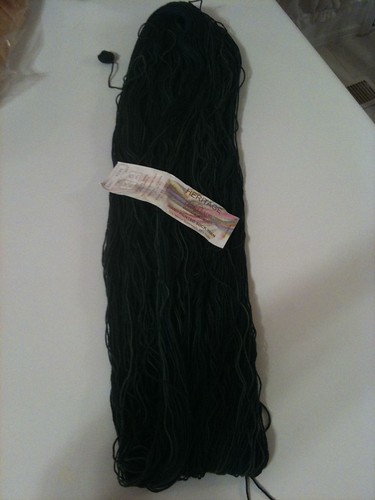
Yarns Ect... to find a suitable substitute. Looking through all the yarns I finally decided on two 50g ball
Sublime Extra Fine Merino Wool in Fruitcake and one 50g ball of Sublime
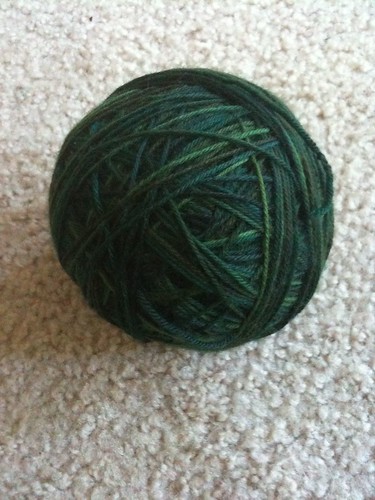
Cashmere Merino Silk in Vanilla. Once I started, I had so much fun, the bear was complete in no time.
Cast on Date: April 22, 2010
Date of Completion: May 10, 2010
As knit by me:
Materials
2 50g ball Sublime Extra Fine Merino Wool DK in Fruitcake
1 50g ball Sublime Cashmere Merino Silk DK in Vanilla
Pair of US size 5 knitting needles
Washable toy filling
Gauge
25 sts and 54 rows to a 4 inch square in garter stitch using US 5 needles
Abbreviations
m1-
make one stitch.
k2tog- knit two stitches together
sskI-
slip, slip, knit "improved"
kfb- knit into front and back of next stitch
tbl- through the back loop
Body (Back)
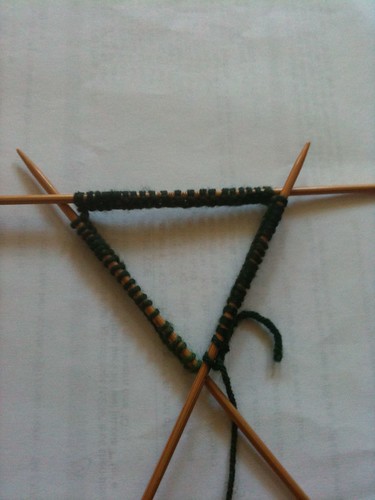
With size 5 needles cast on 22 stitches in fruitcake.
Knit 10 rows.
Continue in garter stitch and increase one stitch at each end of next row and 6 following 6th rows. I uses a
make one stitch.
36 stitches.
Knit 7 rows.
Shape bottom
Next row: K1, sskI, k13, k2tog, sskI, k13, k2tog, k1.
32 stitches.
K1 row.
Next row: K1, sskI, k11, k2tog, sskI, k11, k2tog, k1.
28 stitches.
K1 row.
Next Row: K2, sskI, k9, k2tog, sskI, k9, k2tog, k1.
24 stitches.
K1 row.
Continue decreasing 4 stitches ever other row in this way until 8 stitches remain.
K1 row.
Next row: K1, sskI, k3tog, K1.
Next row: [k2tog] twice.
Next row: k2tog and fasten off.
Body (Front)
With size 5 needles cast on 22 stitches in fruitcake.
Knit 10 rows.
Continue in garter stitch and increase one stitch at the end of the next row and 3 following 6th rows. Use the same method of increase as used on the back. I used make one stitch.
30 stitches.
Knit 2 rows.
Belly color contrast
Next row: k14, change color to vanilla and k2, change color to fruitcake and k14
Knit 1 row using correct color pattern in previous row.
Next row: k13, change color to vanilla and k4, change back to fruitcake and k 13
Knit 1 row using correct color pattern in previous row.
Next row: k1, m1, k11, change color to vanilla k6, change back to fruitcake k11, m1, k1.
32 stitches.
Knit 1 row using correct color pattern in previous row.
Next row: k12, change to vanilla k8, change to fruitcake, k12
Knit 1 row using color pattern in previous row.
Next row: k11, change to vanilla k10, change to fruitcake, k11.
Knit 1 row using color pattern in previous row.
Next row: k1, m1, k9, change to vanilla k12, change to fruitcake, k9, m1, k1.
34 stitches.
Knit 1 row using color pattern in previous row.
Next row: k12, change to vanilla k10, change to fruitcake, k12.
Knit 1 row using color pattern in previous row.
Next row: k13, change to vanilla k8, change to fruitcake, k13.
Knit 1 row using color pattern in previous row.
Next row: k1, m1, k13, change to vanilla k6, change to fruitcake k13, m1, k1.
36 stitches.
Knit 1 row using color pattern in previous row.
Next row: k16, change to vanilla k4, change to fruitcake k16.
Knit 1 row using color pattern in previous row.
Next row: k17, change to vanilla k2, k17.
Knit 1 row using color pattern in previous row.
Next row: k36 using fruitcake.
Knit 1 row.
Shape bottom
Next row: K1, sskI, k13, k2tog, sskI, k13, k2tog, k1.
32 stitches.
K1 row.
Next row: K1, sskI, k11, k2tog, sskI, k11, k2tog, k1.
28 stitches.
K1 row.
Next Row: K2, sskI, k9, k2tog, sskI, k9, k2tog, k1.
24 stitches.
K1 row.
Continue decreasing 4 stitches ever other row in this way until 8 stitches remain.
K1 row.
Next row: K1, sskI, k3tog, K1.
Next row: [k2tog] twice.
Next row: k2tog and fasten off.
Head
With US size 5 needles cast on 32 sts with fruitcake.
Knit 2 rows.
Next row: [kfb, k6, kfb] 4 times.
40 sts.
Knit 1 row.
Next row: [kfb, k8, kfb] 4 times.
48 sts.
Knit 1 row.
Next row: [kfb, k10, kfb] 4 times.
56 sts.
Knit 30 rows.
Next row: [sskI, k10, k2tog] 4 times.
48 sts.
Knit 1 row.
Next row: [sskI, k8, k2tog] 4 times.
40 sts.
Knit 1 row.
Next row: [sskI, k6, k2tog] 4 times.
32 sts.
Knit 1 row.
Continue to decrease in this pattern until 16 sts remain.
Knit 1 row.
Next row: [sskI, k2tog] 4 times.
8 sts.
Knit 1 row.
Next row: [sskI, k2tog] twice.
4 sts.
Cut yarn, and pull through remaining stitches to gather.
Snout
With US size 5 needles
cast on 36 sts in vanilla.
Knit 10 rows.
Next row: *k1, k2tog; repeat from * to end.
24 sts.
Knit 1 row.
Next row: [k2tog] to end.
12 sts.
Knit 1 row.
Cut yarn and pull through remaining stitches to gather.
Legs
Make 2 pieces.
With US size 5 needles cast on 8 sts in vanilla.
Knit 20 rows for the bottom of foot.
Continue in garter st and cast on 14 sts at beginning of next 2 rows.
36 sts.
Knit 6 rows.
Decrease 1 stitch at the beginning of next 10 rows.
26 sts.
Change to fruitcake and knit 30 rows.
Next row: k5, sskI, k2tog, k8, sskI, k2tog, k5.
22 sts.
Knit 1 row.
Next row: k4, sskI, k2tog, k6, sskI, k2tog, k4.
18 sts.
Knit 1 row.
Next row: k3, sskI, k2tog, k4, sskI, k2tog, k3.
14 sts.
Knit 1 row.
Next row: k2, sskI, k2tog, k2, sskI, k2tog, k2.
10 sts.
Knit 1 row.
Next row: k1, sskI, k2tog, sskI, k2tog, k1.
6 sts.
Next row: [k2tog] 3 times.
Next row: k3tog and fasten off.
Arms
Make 2 pieces.
With US size 5 needles cast on 4 sts in vanilla.
Knit 1 row.
Next row: [kfb] 3 times, k1.
7 sts.
Knit 1 row.
Next row: [kfb] 6 times, k1.
13 sts.
Knit 1 row.
Next row: [kfb] 12 times, k1.
25 sts.
Change to fruitcake and knit 36 rows.
Next row: k2tog tbl, k8, k2tog, k1, k2tog tbl, k8, k2tog.
21 sts.
Knit 1 row.
Next row: k2tog tbl, k6, k2tog, k1, k2tog tbl, k6, k2tog.
17 sts.
Knit 1 row.
Next row: k2tog tbl, k4, k2tog, k1, k2tog tbl, k4, k2tog.
13 sts.
Knit 1 row.
Next row: k2tog tbl, k2, k2tog, k1, k2tog tbl, k2tog.
9 sts.
Knit 1 row.
Next row: k2tog tbl, k2tog, k1, k2tog tbl, k2tog.
5 sts.
Knit 1 row.
Next row: k2tog tbl, k1, k2tog.
3 sts.
Next row: k3tog and fasten off.
Ears
Make 2 pieces
With US size 5 needles cast on 13 sts.
Knit 4 rows.
Decrease 1 st at each end of next row and 3 following alternate rows.
5 sts.
Knit 1 row.
Increase 1 st at each end of next row and 3 following alternate rows.
13 sts.
Knit 4 rows.
Bind off.
Finishing
Sew two body pieces together, leaving the shoulders (cast on edges) open. Evenly fill with washable toy filling then sew seam. Sew back seam of head, leaving the neck (cast on edge) open. Evenly fill with stuffing. Sew snout seam, leaving cast on edge open. Position and sew to the head, filling lightly. Sew bas of head to the shoulders. Fold each ear in half and sew to the head. Sew the front seam of each leg, then sew the bottom of foot into place, leaving a small opening . Evenly fill each leg with filling, sew closed, and sew to body.
Sew each arm seam leaving a small opening. Fill each arm and sew closed. Sew arms to body. Make eyes, nose, and mouth from felt or yarn and sew firmly in place.